Here Comes Spring!

When it comes to growing plants, everyone always thinks of Spring as ‘The Season’. Sure, it is the time when you transplant all of your seedlings and clones outside, and it’s when you start seeing your garden grow, but there is definitely a little preparation that can be done during the Winter, unless you’re in a state with snow on the ground right now, in that case talk to me about going indoor. Winter is a crucial time of year for your garden to regroup and get ready for the upcoming Spring. Your garden cannot do it alone though, with just a little help from you your garden can be ready for an award winning Spring.

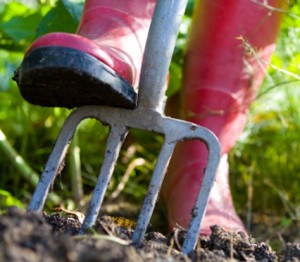
An excellent place to start is with opening up the soil in all of your gardens. Get out that transplanting fork! A regular shovel will do if you must, but a transplanting fork is best because it won’t damage the roots. This will prevent some unnecessary shock. Use your transplanting fork to gently work the soil back and forth. Don’t completely turn it over though, turning the soil over harms the roots that you want to keep. Repeat this in every garden for every plant. After all of the Fall rain the soil begins to compact and become saturated, depleting the oxygen that the roots need. Oxygen will now be able to flow freely through your soil.

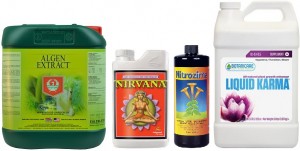
Winter is also a great time to amend your garden with some fertilizer. If you will be eating what you are growing we always recommend using an organic fertilizer. Kelp meal, fish meal, bone meal, and worm castings are just some of the many organic options. There are also organic liquid fertilizers that many times can be combinations of organic nutrient sources that have done the mixing work for you. We are always here to help point you in the right direction.

One very important thing to do during Winter is remove “suckers” from applicable plants and trees. Read up on the fruit and flower bearing plants that you have for the proper “sucker” removal. It can be quite different from plant to plant. Winter is the best time to do this for outdoor gardens because the plants are dormant. If done properly, come Spring, your plants won’t even know they were trimmed, and will bear much more fruit and flowers come Spring. Now all that’s left to do is plan for the upcoming Spring!

Weather Change and Your Indoor Garden

So you have proper air conditioning and were fine in the summer, but now that it’s cooled down outside you’re getting humidity spikes in your indoor grow room?…We’ve gotten to the bottom of this.

During the warmer months your air conditioner is turning on more often to cool the air, but this is only half of it’s function. If it only cooled the air it would probably be called an air cooler, part of the conditioning that it does to the air is dehumidification. While it cools the air it also removes excess moisture, helping keep your humidity down. Plants transpire and release a lot of humidity when the lights go out, but during warmer months the ambient outside air is warm enough to still get your A/C to cycle on and handle the humidity.

Now that it has cooled off outside though, it is easier for your A/C to keep the temperature down in your room, and is therefore cycling on less, especially with the lights off when humidity is at its highest. This will domino into higher humidity in your room. To solve this think of maybe adding a light during cooler months to add some heat, getting your A/C cycling on, and getting you an additional light worth of yield! Also, there is always dehumidifiers which will bring the humidity down, but also create heat and use a good amount of electricity in addition to an A/C. The double dehumidification from the A/C and dehumidifier combined can sometimes be too much…not my favorite option but sometimes the only one.

Keep it green and keep it growing………

Sea Kelp – The Unsung Hero

Extracts from sea kelp contain a vast array of metabolically-active natural growth enhancers, exotic micro-nutrients and organic bio-stimulants not found in regular plant food or supplements. These unique compounds are absorbed immediately and act as regulatory signals, activators or catalysts to produce synchronized and accelerated growth under all conditions. Plants in all phases of growth love sea kelp for the many benefits it provides. They restore and enhance the interaction between soil and roots, improving crop performance. Sea kelp extracts have shown outstanding yield increases and healthier, more vigorous growth. They stimulate the formation of root hair, leading to increased uptake of various trace elements. These substances also play a significant role in the health of your plant’s immune system, providing superior resistance to disease and pests. Best of all, sea kelp is organic, non-toxic, and poses no environmental hazards!

Trust Me…..This is Everyone’s Cup of Tea

The Amazon Jungle flourishes on its own without gardeners, regular fertilization or pesticide application….so why not your garden? The difference is the beneficial microbiology in the soil. In nature, dead plant matter falls to the jungle/forest floor and forms a layer. It then begins to decompose and beneficial bacteria and fungi are born. The rain will then pass through the decomposing layer and bring the beneficial microbiology down into the soil where it can colonize in the root zone of plants. Plant roots excrete carbohydrates and sugars that the microbiology feeds on, so this attracts them to the root zone.

There are many species of beneficial fungi and bacteria, and each one serves a different purpose. Protozoa consume the plant sugars and excrete out waste in the form of available nutrients for the plant. Certain fungus will attach to the roots to also feed on the sugars, creating chains of fungal hyphae that can be up to 40 miles long. These chains will then absorb water and nutrients that are too far for the plant to reach, and bring them back to the plant. Beneficial fungi and bacteria will always fight off bad bacteria and fungi, providing protection from pathogens and harmful microbes. It’s a very harmonious relationship. The plant feeds the beneficial microbiology, and in turn the microbiology feeds and protects the plant.

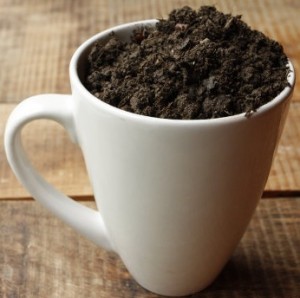
Now, the soil you have at home has most likely been treated with mineral-based fertilizers and/or pesticides at one point. Possibly even regularly. Both of these are going to have salts in them, and of course salt kills bacteria and fungus. Once the biology in your soil has been killed off, your yard will require regular feedings and/or fungicide and pesticide treatment because nature can no longer do it. The good news……you can put the beneficial microbiology back into your soil with Compost Tea! Compost tea is made by adding compost to water and oxygenating, or bubbling, the water for 24 hours. The finished product can have 10,000 times the biology as the original compost used due to the oxygen rich environment. With normal applications of compost tea you can bring your soil back to life again. This will make your garden much healthier, more productive, more flavorful, more aromatic, and much easier to take care of. You will be letting nature take care of the plants rather than having to do regular applications of fertilizer and pesticide, not only killing your soil but also causing environmental issues. Stay green…stay growing.

First Things First

So you want to start an indoor garden? Where to start? Many beginners, including myself when I started, have trouble putting everything in the right order. My recommendation? Environment. Specifically, temperature and humidity.

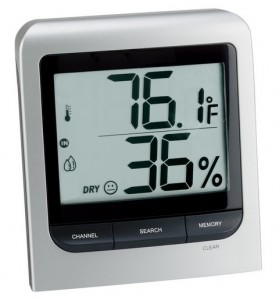
Banana trees and chili peppers will not grow in the Arctic. Every plants has a climate that it prefers. You need to do your best to mimic that. Everything else can be perfect, but if the temp and humidity are way off your plants will not be happy or do well at all. When temp and humidity are on point, the plant functions as it should and in turn lets you know if what you are doing is working. Try your best to keep temps within 5 degrees(both high and low) and humidity within 10%(both high and low) 24 hours a day. A problem in an indoor grow room is always easier to diagnose when temp and humidity are correct.

Temperature can increase or decrease water uptake, leading to an increase/decrease in nutrient uptake. High temps will also attract bugs. Humidity that is too high/low can force plants to completely stop photosynthesizing. High humidity can also cause mold and mildew. This just names a few issues, but the list can go on. So…..when you are getting ready to get that indoor room started, your first item of equipment to purchase is your Air Conditioner. As always, give us a call or come on by and we will let you know what size air conditioner is best for your room.


It All Starts with Water

Water quality is definitely a determining factor of the outcome in your hydroponic garden. Persistent problems in hydroponic systems are often traced back to the water supply. Water is the basic transportation in a hydroponic system, dissolving and transporting nutrients to the plants. However, water also dissolves impurities. These impurities cannot be easily detected visually, if at all, and can be harmful to plants. Growers commonly make incorrect assumptions about the purity of water, solely basing it on clarity. Assuming that the crystal clear, odorless water they get from the tap is pure water, and in turn should be safe for their plants. After all, it’s safe for people to drink…so why not your plants, right? Wrong.

Plants tend to be more sensitive to certain water treatments than people. There are often impurities left in “Safe Drinking Water” that are a problem for your plants, especially in a hydroponic system. City water supply specs for drinking water vary from city to city. City water supplies are generally treated with chloramine or chlorineto bring them to drinking quality. These specs are for making water safe for people, not plants. In a perfect world, the solids in tap water should be mostly calcium, magnesium, and some trace minerals. In actuality much of the starting ppm consists of unknown contaminants. There is no way to know, without a full lab analysis, how much of the starting ppm is minerals that are good for plants and how much are contaminants. Contaminants include agricultural and/or urban runoff, industrial waste, sewage, leaves, silt, plankton, etc. Piping and plumbing have also been known to release metals into the water. This is a problem because if your starting ppm is 500, and your target is 700, you will only be able to add 200 ppm of proper nutrient value! Your plants should be receiving 700 ppm of proper nutrient value.

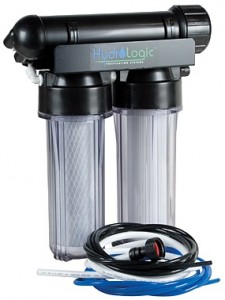
Starting with pure water, 0 ppm, allows you to add every part of nutrient value in the precise quantities required during each phase of growth. Being able to accurately control the content and ppm of your plant food will give you the ability to produce incredible results and have abundant harvest every time. Starting with pure water will also help you avoid nutrient deficiencies or lockout problems. If you do not start with pure water, we recommend having your water tested prior to using it in your garden. Bad water quality can lead to numerous problems such as mineral toxicity, stunted growth, mineral/salt build-up, bacterial contamination, etc. The good news is that in most cases, water quality issues have simple solutions that do not involve complicated procedures or techniques. A reverse osmosis filter with a KDF carbon cartridge will get you pure water without chlorine or chloramine, which is ideal for your plants. There are also inexpensive in-line filters that can be attached right to your faucet/hose that remove solids as well as chlorine and chloramine. Stop by or call today and let us help you get the most out of your water!

Just Say No to GMO


Except for those living in Vermont, one right we do not have in America, is to know whether our food is GMO or not. At least, not yet. Until all the other states follow suit however, we must not lose the power of the people. Over 90% of us want them labeled. By not buying GMO products, we can still be heard. Nothing gets “their” attention like losing money, and this is BIG money. Did you know the average person consumes 193 pounds of GMO products in one year. Yes, YOU!

Genetically Modified crops are designed to withstand pesticides, therefore more pesticides are used. An increase of 404 MILLION pounds of pesticides from 1996 to 2011. This then makes the weeds stronger and more resistant, requiring harsher herbicides…..one even containing an ingredient used for Agent Orange! Terrible for the environment, and most certainly not good for us at all. Due to the lack of long-term study however, it is unknown what all the affects are. What is known, is that since GMO products have hit the market there has been a huge increase in cancers, infertility, Autism, and the list goes on. Coincidence? I think not.

Monsanto, and other chemical companies create GMO seeds and then patent them, forcing farmers to buy new seeds every year. First off, patenting a seed, the beginning of life, is absurd control. Second, do we really want chemical companies controlling our food? The only correlation there is money, not health. Current GMOs are corn, soy, canola, sugar beets, cotton, rice, potatoes, peas, dairy products, Hawaiian papaya, some zucchini and yellow crookneck squash, and alfalfa (cattle feed). So buy USDA organic, especially for any of these known GMOs. Organic seeds are always Non-GMO. Look for the Non-GMO Verified Project seal. Buy brands that are sourced to be GMO free, such as Trader Joe’s. Processed and packaged foods should be organic whenever possible, or avoided all together. Whole foods are less likely to contain GMOs. Choose extra virgin olive oil or organic canola oil instead of canola, corn, soy, or cottonseed oil. Choose cane sugar over sugar and high fructose corn syrup. These are all simple changes that can be done to keep you GMO free and start hitting “their” bank account. Together, we will make a difference.

Seedlings and Cuttings Can’t Be Rushed

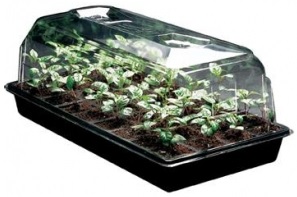
A customer recently asked “it’s been three days, how come I don’t see anything yet?”. While plants do grow at extreme rates once they start going, starting them off from seed or clone takes a little patience. General rule of thumb is 7-14 days, but many plants can take longer than this. Always read up on what you are growing. The key is to not let the media be too wet, while maintaining high humidity in the air around it. Starter cubes should be nice and moist but never dripping wet. If they start to dry out (about day 5 or 6) go ahead and add water directly to the cube. Never leave standing water in the tray.

For seedlings and cuttings in a tray and dome you want 90%+ humidity. Transplanting will then depend not on how much  plant you see above the starter cube, but how many roots you see below the starter cube. Once you see your first root poking out do not rush to transplant yet. Open the vents on your dome and slowly start acclimating your new babies to lower humidity levels. Also, letting the roots air prune in their starter cube will give you more explosive root growth after you transplant, as opposed to the first tap root just taking off. After a couple days with the vents open, you can start taking the dome off. A few hours at first, and then more and more each day until they are just fine without it. Now, you are ready for transplant with strong cuttings/seedling that will make it!

A Short Lesson In Humidity

Humidity, simply put, is the amount of water in the air. Even more, warmer air can hold more water than cooler air. So for garden purposes let’s talk Relative Humidity, or the amount of moisture in the air as a percentage of the maximum for a given temperature. Humidity affects plants much like it does people. For example, 80°F feels much hotter in Florida than it does in California. Why? The Relative Humidity of course! While the temperature may be the same in both locations, the Relative Humidity in Florida will be close to 80% but only 35% in California. The more moisture that is being held in the air, the less the air can continue to take on. At a Relative Humidity of 80% the air is unable to evaporate your perspiration like it would at 35%, and this is how the human body cools itself. When there is less Relative Humidity, the air is able to “absorb” the moisture coming off of your body, and in turn, cools you off.

Similarly, plants also “sweat” or transpire. Only about 5% of the water plants absorb through their roots is retained, the other 95% is transpired back into the air through the plants “pores” or stomata. Almost all the water is just passing through the plant. This constantly cools the plant, keeping it from overheating and drying, so that the plant can continue on with growth and flower production. Also note that plants only photosynthesize when the stomata are open. If the stomata close, photosynthesis completely stops.

Back to relative humidity. We know that the more humidity that is in the air, the less moisture the air can “absorb”. We also know that plants must transpire 95% of the water they absorb so they can keep cool and keep photosynthesizing. So, if humidity is too high in the room the plants will not be able to transpire and will not be photosynthesizing or growing properly. Not transpiring also means they are holding water, which means they are not drinking more water, so they are not taking in nutrients. High humidity is also ideal for mold and mildew. On the other end, if humidity is too low, the air will practically pull the moisture right out of your plants and they will close their stomata in defense again shutting down photosynthesis.

The lesson here: If humidity is too low or too high, your plants are not growing.

The Mistakes That We All Made, But You Won’t…

My eyes were bigger than my stomach. Indeed, all too often humans have the tendency to take on more than they should. It is no different in the gardening world. While I do understand the ambition and motivation behind someone that has decided to invest all their time and money into a dream business of theirs, that business is usually something that they know, love, and have experience with. So when going to decide what type of garden you are going to have, first decide whether it will be an investment or a hobby. If gardening is something you know, love, and have experience with then investing into it and making it a profitable business for yourself is feasible. Otherwise, treating it like a hobby may be a better fit, and more enjoyable. Starting small always leaves you the option of expanding, and there are many starter kits that are expandable themselves. We are always willing to go over your options with you, show you what’s available to you, and figure out what set up will best fit your needs.

Your Mother does not work there…and even if she does, maintaining a clean grow area is crucial. A commonly missed, but great opportunity for cleanliness is before your grow even starts. Empty the room out, take out old curtains and carpets, sweep and vacuum, sanitize all surfaces!! Start clean and finish clean. Upkeep is just as important as the initial scrub down. Always remove any dead plant matter, used cubes, empty nutrient containers and packages, etc. It is also best to change your clothes and shoes before entering your grow area. You don’t notice during the day how many plants you brush up against, and how many pests and spores your shoes come in contact with. Not changing your shoes alone will almost always guarantee the spread of pests. Clean is key. For the hobbyist, this will insure the most enjoyment. A hobby garden destroyed by pests is as painful as a model car that took thirty-six hours to build being destroyed by a little sibling in thirty-six seconds. And for the professional your grow area is your office, your laboratory even, treat it as such. Always maintain a professional, clean work area. A hit to the pocket book that could have been prevented by simple tidiness is a hard one to take.

How long should they veg? I hear this question often, and I understand why. Outside plants do their own thing, they go through their vegetative state and then start flowering when they are supposed to…and they do it all by themselves! When we go indoor, and we control everything, “when” is a required question. With indoor, you need to know your plants growth habits. Specifically, how much does it continue to grow after it has started flowering. Many plants double, even triple in size after they have started flowering. So for the indoor grower, this would mean that you need to get it into flower mode once it has reached 1/2 to 1/3 of the total available height. Let me guess, you veg’d too long? That’s the usual response. Don’t freak out, we all go through a learning curve. As always, contact us if you need help or have questions on how to get your overgrown beasts back under control.

When in doubt, it’s the water. Hydroponics at it’s core is working water, derived from the Greek words hydro (water) and ponos (labor). Hydroponics is all about the water. Many of us will start off using tap water, because it is readily available and “everything seems to be going fine”. If you are somewhere that the tap water is less than 300ppm, it is not hooked up to a water softener, and your local water treatment facilities are not using chloramines, or you are gassing off the chlorine, then you are probably fine. Sad to say, these conditions are hard to find. If you are ever having issues with your plants, and you have gone through the checklist: temp, humidity, light schedule, feeding schedule, pH levels, ppm levels, air circulation, co2 levels, etc., and find yourself saying “I’m doing everything right, I don’t know what it is”; it’s the water. Even with low ppm levels in tap water, you never know what those ppm’s consist of. There is almost always chlorine or chloramines to deal with, and the list goes on. Getting the proper Reverse Osmosis or even simple KDF8 Carbon or Sediment filters for your set up will make all the difference. Then your plants will only be getting what you are giving them, no mystery minerals or salts that could be harming them. With water being the foundation of hydroponics, you can go forward knowing that you are building on a solid one!

Last but not least…..why didn’t I do hydro sooner?! Many people find out about the accelerated growth rates, increased yields, and higher quality that can be achieved with hydroponics and wonder what they are still doing in soil. Some are scared away from hydro by someone (who hasn’t tried it yet, usually) who says “you have to be a scientist” or “there are all these chemicals you have to use”. On the contrary, if you are truly doing soil right, the only difference is the container and the grow media. Everything that you would do with hydro, you should be doing with soil. pH levels are always important in hydro and soil both, and hydroponics uses the same mineral and organic based fertilizers as soil only they are in liquid form opposed to dry. The watering schedule can be the same, the lighting requirement the same; temp, humidity, air circulation, co2……all the same! Don’t let someone scare you out of bigger, better, faster yields. If you are currently using soil, let us show you how simple it is to convert what you already have into a hydro set up!